
one
two
three
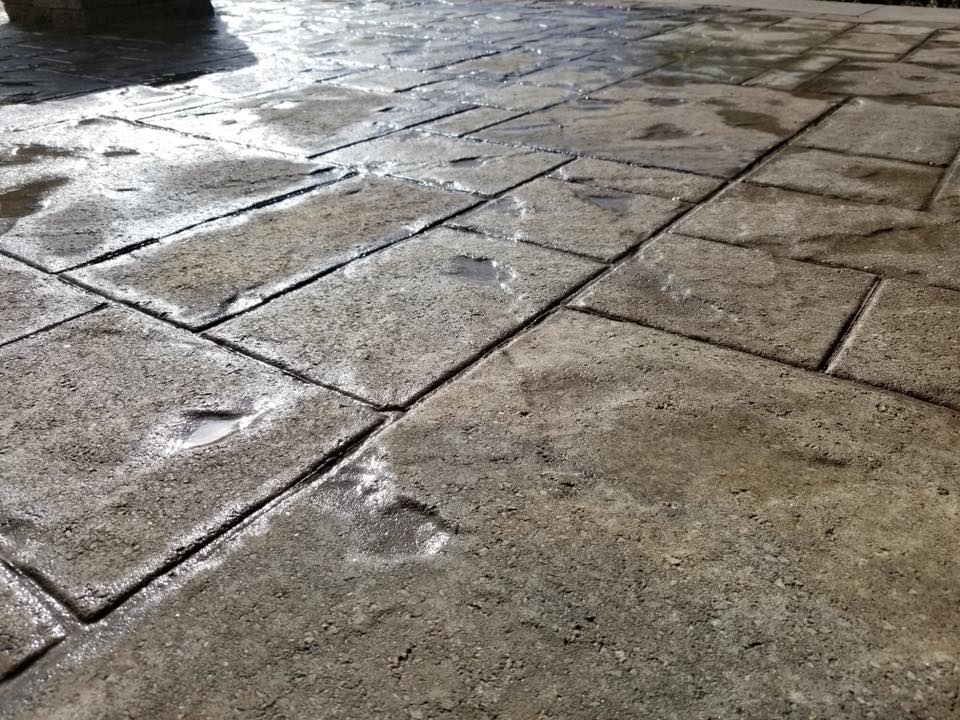
If you are having pavers installed, you will need something to fill the spaces where the pavers meet. We will educate you on the options and expectations for filling and maintaining the joints of your patio pavers.
First of all, it is important to understand that concrete pavers, in general, are designed to be installed as a flexible pavement system that will move with the ground as it moves. Most movement of the ground will come through freeze and thaw cycles where the ground can expand and contract depending on many variables such as moisture content, temperature, wind, and sun exposure. Most concrete paver systems are designed to be installed in a flexible way to allow for this movement of the ground in areas of extremely high and low temperatures.
There are two major types of fillers used between pavers.
Grout is not one of the two choices. Our clients often refer to the joint filler as grout, and this is inaccurate. Grout is typically designed to be used indoors between tiles, and it is always part of a rigid pavement system. Gout is NOT designed to be flexible, and if it moves, it will crack because of its rigidity. In some cases, an exterior grout can be used if the base is constructed in a rigid technique with footings below the frost line to prevent movement. This is not the typical standard of residential paver installation today, mainly due to being cost-prohibitive in most cases.
Regular builder’s sand or brick sand was often used for filling pavers up until the turn of the century. The problem with regular builders’ sand is that it quickly blows or is washed out from between the pavers. While this is an esthetic problem, it can and does look bad, and no one wants their nice paver patio to have gaps between the stones. If sand is used as a bedding layer, it can also become a structural problem if the bedding layer begins to wash away.
In 1999 Techniseal introduced Polymeric sand to the market. This is sand that is mixed with a polymer that binds the sand particles together. This makes it last longer. It is not permanent, however. Over time, the polymer will break down, and the sand can wash or blow out, so it does require some maintenance. It typically will last at least three to five years before that is necessary to touch up or re-sand any areas.
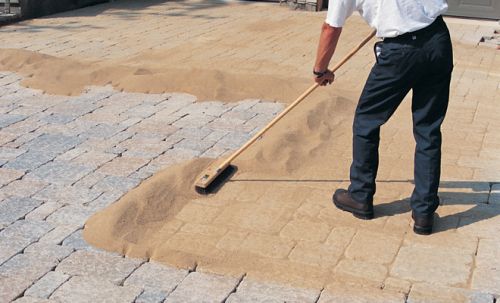
When applying polymeric sand, it is important to wear a dust mask as it can be harmful if inhaled. First, pour Polymeric sand onto the pavers and sweep it into the joints. Compact the pavers to settle the sand with a rolling plate compactor or a hand tamper. Then fill and tamp again until the sand is 1/8th inch from the paver level and doesn’t consolidate any further.
Blow sand residue from the top of the pavers. It is important to get all the sand off the top of the pavers, or you will have a haze on them. Use a leaf blower set on low and held about waist high to help.
You want to add enough water to activate the polymer but not so much that you float the polymer right out of the sand. Use a water nozzle turned to the shower setting. Water the joint until the sand just stops absorbing water. Pause and let the water soak in. Water again until no more water soaks in, but you do not see a milky white substance on top of the joint. Do 10 feet by 10 feet sections at a time. Once the polymer sets, you won’t be able to add more water.
The polymer will cure in 24-72 hours, depending on the temperature and dryness of the area. Polymeric sand in shade can be a bit more spongy than Polymeric sand in the sun, even after it cures. Do not let the sand get rained on hard until it is set. You may need to cover the sand with a tarp to protect it from rain. You should avoid excess foot traffic for 24 hours and any vehicle traffic for 72 hours.
We see these mistakes over and over when clients use Polymeric sand.
If the joints and pavers are wet, the polymer will start to set up prematurely. This causes a haze on the pavers and leads to poor joints. The pavers and joints must be bone dry before you start. The sand will also stick to the top of the pavers and become a difficult mess to clean up.
If you do not water the Polymeric sand enough, it does not activate the polymer. When this happens, a crust forms on the surface but the sand below this crust is not bound together. The unbound sand moves out from under the crust, which then collapses.
If you apply too much water, the polymer floats out of the sand and drains away. It can leave a haze behind on the pavers as it runs across them. You are left with sand between the pavers and a haze on them.
Sand that is left on the pavers will bind to the pavers and leave a haze on them, detracting from the beauty of the pavers.
The drainage under the pavers and joints must be good, or the water will back up and not filter through the Polymeric sand, allowing the sand grains to bind to each other. A very slight slope will aid drainage and help prevent problems. We have also shifted from a sand bedding layer to an open aggregate base that helps with drainage below the pavers, especially in dark and damp Northern exposures.
Too much sand can cause problems. It is important to keep the level of the sand in the joint 1/8th inch below the surface of the paver. If the sand is level with the paver, the water will back up over the paver, and the polymer will cause the paver to be hazy.
Joints should be at least 1/8th inch and no more than four inches. The joint depth should be at least one inch. If the joints are too narrow, the water cannot flow down and properly activate the polymer. If the joints are too wide, the sand will wash out before the polymer sets up.
As mentioned, polymeric sand does require some maintenance. Regular cleaning with a blower and/or a hose will help keep the pavers and joints in good condition. You can power wash your paver patio if you are careful not to blow out the sand. Keep the power washer moving and never aimed directly at the joints. Periodically, you will need to chemically clean and re-seal the pavers and joints. You may then need to sweep new Polymeric sand into the joints to fill any low spots. Just make sure it is completely dry first.
When it comes to paver joints, polymeric sand is often seen as the gold standard. And it is the best solution we have for filling joints in a flexible pavement system, and it does a great job. However, like any construction material, it is far from perfect and is definitely not maintenance-free. The ground will move and over time the sand will move, crack, wash or settle and will need some maintenance. It is critically important that consumers understand the history, design, and intent of this product to ultimately have a successful paver project for both the client and the contractor.
Royal Creations Architectural Landscaping has a paver maintenance program. We have options that include Spring clean-ups, as well as regular cleanings (blowing, power washing, and chemical cleaning), along with regular re-sealing of pavers to enhance the color and sheen. To sign up for our paver maintenance program, schedule a consultation now before the spring rush hits.
© 2020 Royal Creations Architectural Landscaping
Terms and Service | Privacy Policy | Careers | Site Map | Warranty